Monday, April 11, 2011

Diorama!


Warning...this post contains maternal boasting. For this month's book report, my daughter's assignment was to create a Diorama to share with her class. She had just finished reading Little House in the Big Woods and decided to create her Diorama using this book. She worked hard on it and was very independent. She made the house, the smoke house, painted the horses and made two of the bodies for the people. She even made some bacon to go in the smoke house. Upon delivering her Diorama, I noticed one that was superb and thought it would take first place for sure. However, it didn't appear to be the handiwork of a kid and I guess the judges took that into consideration. My daughter came home from school and informed me that she had, once again, won first place for best Diorama. I was thrilled! Her prize was the book Candy Shop War. Here are the pictures of Kambrie's Diorama.
Pa did end up looking more like an ax murderer than a father!

Sunday, March 27, 2011

Apple Pi


To celebrate Pi day in my daughter's class, some parents were asked to bring pies to the school. I brought a homemade apple pie and a store-bought chocolate pie. As the children lined up and began choosing their slices, I was surprised to see that all the nasty store-bought pies were the first to go. I'm not complaining about bringing home an empty store-bought pie tin and an almost-whole apple pie, just a bit surprised considering the fact that the apple pie I made was the only homemade one there.

Here is the recipe for the filling..

1/2 Cup sugar
1 1/2 Cups pineapple juice
1 tsp. cinnamon
1/2 tsp. nutmeg
1/2 tsp. grated lemon rind
4 Cups apple slices
Pastry for 9 inch pie
2 Tblsp. cornstarch
2 tsp. cold water
1/2 tsp. vanilla
1 Tblsp. butter
1/2 Cup chopped walnuts

Combine sugar, pineapple juice, spices and lemon rind. Bring to a boil. Add apple slices and simmer 10 minutes. Line a 9-inch pie plate with pastry. Lift apple slices out of syrup and put in pie shell. Dissolve cornstarch in water. Stir into syrup in pan and cook until mixture thickens. Stir in vanilla, butter and walnuts. Pour over apples.
I made a streusel topping for this pie but you could place criss-crossed pie crust over the top as well. Bake at 450* for 10 minutes. Reduce temperature to 350* and bake for 30 minutes. Cool completely before slicing. Enjoy!

Sunday, March 20, 2011

Easter Eggstravaganza!!


I was searching for fun things to make for Easter online and I found several of these ideas at www.marthastewart.com I loved trying them and here are the results with simple instructions. Be sure to visit Martha's website for official instructions on the crepe paper carrots, napkin decoupage eggs, the cupcake chicken and many more fun ideas!

The place card nest is formed by putting licorice ropes in the microwave for a few seconds, shaping them into a nest and letting it cool. Add some jelly beans and set it on a twig.
The carrots in the basket are made from crepe
paper. Just wrap it around itself and insert tiny surprises as you go. Glue a bit of cut green crepe paper on the top so it resembles a carrot. These would make great party favors for kids.
The waffle cone carrots are painted with orange food coloring and then jelly bean filled green cellophane is shaped like a cone and tied shut with raffia.

The chicken cupcake is my favorite! The recipe is a cake mix made according to the package directions for cupcakes. Then, mix together 4oz. cream cheese, 2 Tblsp. butter, 1/4 C. sugar add 1 egg, 1 Tblsp. flour and 1/2 tsp. vanilla. Mix and then add 1/2 C. chocolate chips and 1/2C. coconut. This is a fun addition to a plain cake mix and as the cupcake bakes, the cream cheese mixture will sink to the middle so when you bite into it, you get a tasty surprise! Drop a spoonful of this mixture on each (filled 1/2 way with batter) cupcake and then bake for 18 min. in a 350* oven. Unwrap the cupcake once it has cooled and turn it upside down on a plate. Frost with a thick buttercream icing forming a mound on top. Sprinkle with toasted coconut. Insert black licorice eyes and combs and feet out of red licorice pieces. Add an almond for the beak. My favorite is a chocolate cake mix because when you take a bite, the insides are a contrasting white.
I had fun making these and they are so easy anyone can do it!

Sunday, February 27, 2011

Flour Sack Shower Curtain.


Despite my aversion to sewing, I have affectionately named my sewing machine Ambrosia. Ambrosia and I became best friends this past week as I worked on a project I will never attempt again! I barely survived the evil basting. I pricked myself countless times, bled from every finger learned that I really do hate sewing by hand and wondered why I keep subjecting myself to it. I guess the finished product holds just enough allure to keep me coming back for more. I persisted and though it is full of flaws, I finally finished my shower curtain!

The first picture is the inception and the last picture is how it ended up.

Sunday, February 13, 2011

Valentines Day Box!


When I was a kid I loved being able to create my own Valentine Box at home and take it to school. Half of the fun was trying to decide what I could concoct from the various boxes and other things I was able to round up.
When my kids started school they had discontinued the tradition of making a Valentine Box at home. This tradition had been banned somewhere along the way. My boys experience with Valentine Boxes consisted of paper holders that were made at school to hold all of their Valentine treats.
This year, for the first time since any of my children have been enrolled in grade school, my daughter was told she could create her own Valentine Box and bring it to school. She came home very excited about being able to create her own box. I asked her if she had an idea of what she wanted to make. After a little thought, she decided that she wanted to create WALL*E (from the Disney/Pixar movie).
This project took some creative thinking and after saving boxes, cardboard and styrofoam, we were able to attempt to make WALL*E. Here is the end result. We did add a plant in one hand and found a friend cockroach.

Happy Valentines Day!
I am writing this after school on Monday, February 14th. My daughter came home elated because she won the prize for the very best Valentine Box!!! I just had to share the happy ending to this story.

Friday, January 28, 2011

Fancy things with fabric


I have decided to take on trying a new lost art. The art of making lace. It requires bobbins to hold the strings. The beads at the top of these English style bobbins are to assist them to lay flat as you work your piece of lace. I finished beading all of my bobbins...which is called spangling and I made a holder for my bobbins using some scraps of material that my grandma gave me from her collection so it holds not only my bobbins but memories as well.
They fit nicely in this and it is perfect for storing them as well as carrying them around. This is going to be handy and keep my bobbins from getting all tangled.

Saturday, January 15, 2011

Snowman in my front yard!


When you are small everything seems so large. I remember winters as a kid and it seemed like we got mountains of snow. The snow on either side of the sidewalk was so high it was difficult to see over. I live in the same valley now as I did growing up. It may be perspective, but I am fairly certain we don't get as much snow as we did when I was young. No wonder we hear stories from our parents about how when they were little and they had to walk up hill both ways to school in snow six feet deep!
I have always liked the snow. My brother and I would wake up and be so excited to go out and romp in it all day long. I remember countless times trying to build a snowman and rolling the ball around until it was too heavy for the both of us to push any further. We would end up making forts and such with the intended snowman body parts because we weren't able to lift them onto each other.
A couple of my kids really like the snow. One of them that helped me build this snowman is going on eighteen and he still plays in the snow!
I love the background in this picture. It almost looks surreal.


Ultimate Cinnamon Rolls

The quest for the BEST cinnamon roll recipe ever is now complete! Yummy!
1-1/2 T. yeast
1/4 C. warm water
1/2 C. shortening
1/3 C. sugar
1-1/2 t. salt
1 C. milk
1 egg
4 to 5 C. flour
Mix the warm water and yeast and let stand 10 minutes. Scald milk, pour over shortening. Add sugar and salt and cool to tepid. Add yeast and beaten egg. Add four cups of flour one at a time, beating after each addition. Knead until smooth. Put in a oiled bowl and let raise for 1-1/2 hours. Roll out into a rectangle. Cover with butter, brown sugar, cinnamon, nuts and raisins if desired. Roll up. Cut with a piece of dental floss into one inch sections (I usually like my cinnamon rolls to be taller but if you make this recipe larger than one inch they won't cook in the center). Place on a greased jelly roll pan and let raise another hour. Bake in a 350 degree oven about twenty minutes (I ended up cooking them 25 min.). Remove from pan and frost with a glaze.


2C. powdered sugar
1T. melted butter
1t. vanilla
2-4 T. milk
Mix and drizzle over rolls while still warm.

Making Lace


My sister and I got together the other day and made some lace. It is very addicting. I learned some basics and she made her first bookmark.

Tuesday, January 11, 2011

Cream Puffs


I asked my 19 year old son to follow the recipe and make cream puffs for me while I ran to the store. They turned out better than when I make them!
The recipe is my grandmothers.

Cream Puffs
1C. water
1cube butter
1C. flour
4 large eggs
Bring water and butter to rolling boil. Stir in flour over low heat, stirring until mixture forms a ball. Remove from heat.
Stir in eggs one at a time, beating until dough is a smooth ball. Using teaspoon drop on cookie sheet about 3" apart.
Bake at 400 degrees for 25 minutes or until puffed, golden brown and dry. 

Custard Cream Filling
3/4C. sugar
1/3C. flour
1/2tsp. salt
2C. milk
4 egg yolks, beaten
2tsp. vanilla
Mix sugar, flour and salt. Stir in milk. Cook over medium heat, stirring constantly. Boil for 1 minute. Remove from heat and stir about half of the mixture into the egg yolks. Blend this into the hot milk mixture. Bring just to a boil. Add vanilla. Chill. Fill puffs.

Bobbin Lacing!


I made a cover for my pillow and finished spangling one set of bobbins! My sweet mother crocheted a bobbin holder for me. I am excited to commence learning how to make lace!
My pillow is made from the blue insulation board that you can purchase at a hardware store. I have found that it works well.
I have also discovered that having a stash of lapel pins is helping me to hold the bobbins out of my way while I am learning.

Wednesday, December 22, 2010

ABC Christmas Scrapbook


Yet another item that holds fond childhood memories. My mother had one of these when I was little and I loved turning the pages and feeling all of the dimensional cards.
I think this is a great way to use and preserve the plethora of Christmas cards that don't seem to come flooding in like they used to now that we have so many modern conveniences like the internet.
Here is the rhyme that goes along with it..
A is for angels with halos so bright, whose carols were heard on that first Christmas night.
B is for baby the Christ child so dear, we celebrate Christmas his birthday each year.
C is for candles that so brightly shine, to give a warm welcome to your friends and mine.
D is for doorway with garlands of green, to make Christmas merry as far as they're seen.
E is for evergreen with fragrance most rare, so plentiful at Christmas their scent fills the air.
F is for fun the whole season long, from trimming the tree to singing a song.
G is for greetings, a merry "hello", with a heart full of love for people we know.
H is for holly with berries so red, we make into wreaths to hang overhead.
I is for Ice on snow covered hills, where sledding is fun along with the spills.
J is for jingle bells merrily ringing, to the whole world joy they are bringing.
K is fro Kris Kringle, so merrily he stands, he is called Santa in so many lands.
L is for lantern, I'm sure that its light helped Mary and Joseph on that first Christmas night.
M is for Mary, her heart full of love for her son, little Jesus, who came from above.
N is for noel, the angels did sing, to herald the birth of Jesus, our king.
O is for Ornaments, so shiny and bright, with lights on the tree that sparkle at night.
P is for packages, presents this way, all around the tree for our Christmas day.
Q is for quiet, Christmas eve night, with snow covered hills glistening so bright.
R is for red, a color so bright, we use it to decorate everything just right.
S is for shepherds who saw the first star, over Bethlehem's manger, and followed it far.
T is for trees we decorate with light, they wait for old Santa to come late at night.
U is for universe, the whole wide world, where Christmas brings joy to each girl and boy.
V is for Vixen, the lively reindeer, who always helps Santa deliver toys every year.
W is for Wisemen, who brought gifts so rare, and fell down and worshiped the Christ child there.
X is for X-mas, a short spelling for Christmas, but we like to spell it this way, "Merry Christmas"!
Y is for yule logs, whose bright sparks fly high and give a warm welcome to friends passing by.
Z is for zeal we show at this time, in giving to others and loving mankind.

Small scraps made into something beautiful.


My mother owns an old pieced crazy quilt that I have always loved. I decided to try to reproduce it. It took me over a year to finish. I really enjoyed piecing the quilt together. I have an old Singer featherweight machine from when I was a little girl and it works really well for piecing. The tedious part was all the hand sewing involved.
Here is the result. I have it hanging on my living room wall. I admire how people used to use every last bit of everything.
I am not much of a seamstress. I look up to those who are. As a matter of fact, I really dislike sewing. I am, however, grateful for the little old lady who lived down the road from us. Her name was Mrs. Johnson and she offered to teach children how to sew at no cost to them. One of my brothers and I took lessons from her once a week. She gave us an invaluable gift. I am indebted to her for her kindness. I remember making a bean bag frog, a baby blanket and a shirt. She would have been in her 90's and I was in the third or fourth grade. The brother of mine that took lessons from her was thrilled with the way the sewing machine worked. He loved pressing the foot down and sewing fast (like driving a car...well almost). Mrs. Johnson was constantly warning him not to run over his finger. She was a very patient woman.

Sweetly Divine!


The stockings are hung by the chimney with care....and all the candy is finally finished!
I have wanted to learn to make candy for a long time. I used to live by a little old lady that made the most delicious candy I had ever eaten. I begged her to share her recipes or teach me how to make it. She said it was difficult and took too long. I was set back but didn't give up on my desire to learn this art.
In the meantime, I searched for candy recipes but could only find the easy fudge, truffles and such. I didn't give up and five years ago I found a book that takes you step by step through the candy making process. I bought this book from a local store but I am hoping you can find it via the internet. It is fittingly titled Candymaking by Ruth A. Kendrick and Pauline H. Atkinson.
My favorite fondant is as follows but if you are going to try this I recommend reading about how to make fondant. There are a lot of recipes and tips on the internet. The thing I find most helpful is to boil water with the candy thermometer immersed for a few minutes to see what temperature water boils at the day you are going to make candy and then adjust your recipes accordingly.

4C. Sugar
1&1/3C. Cream
1/3C. White Karo Syrup
1/3 Square Butter
Dash of Salt
Combine everything in a heavy saucepan. Wash down the sides of your pan with a wet pastry brush to rid yourself of any sugar crystals.
Cook to 227 degrees on your candy thermometer.
Without scraping the pan, pour contents out on a cold surface (I use a marble slab). When it is cool to the touch begin beating until it looses its gloss and changes texture.
You can divide it up and work the flavor in with your hands or use three capfuls of flavoring per batch and add it after about fifteen minutes of beating. It should take about thirty minutes to beat it but I have made some that has taken close to an hour.

Good Enough to Eat


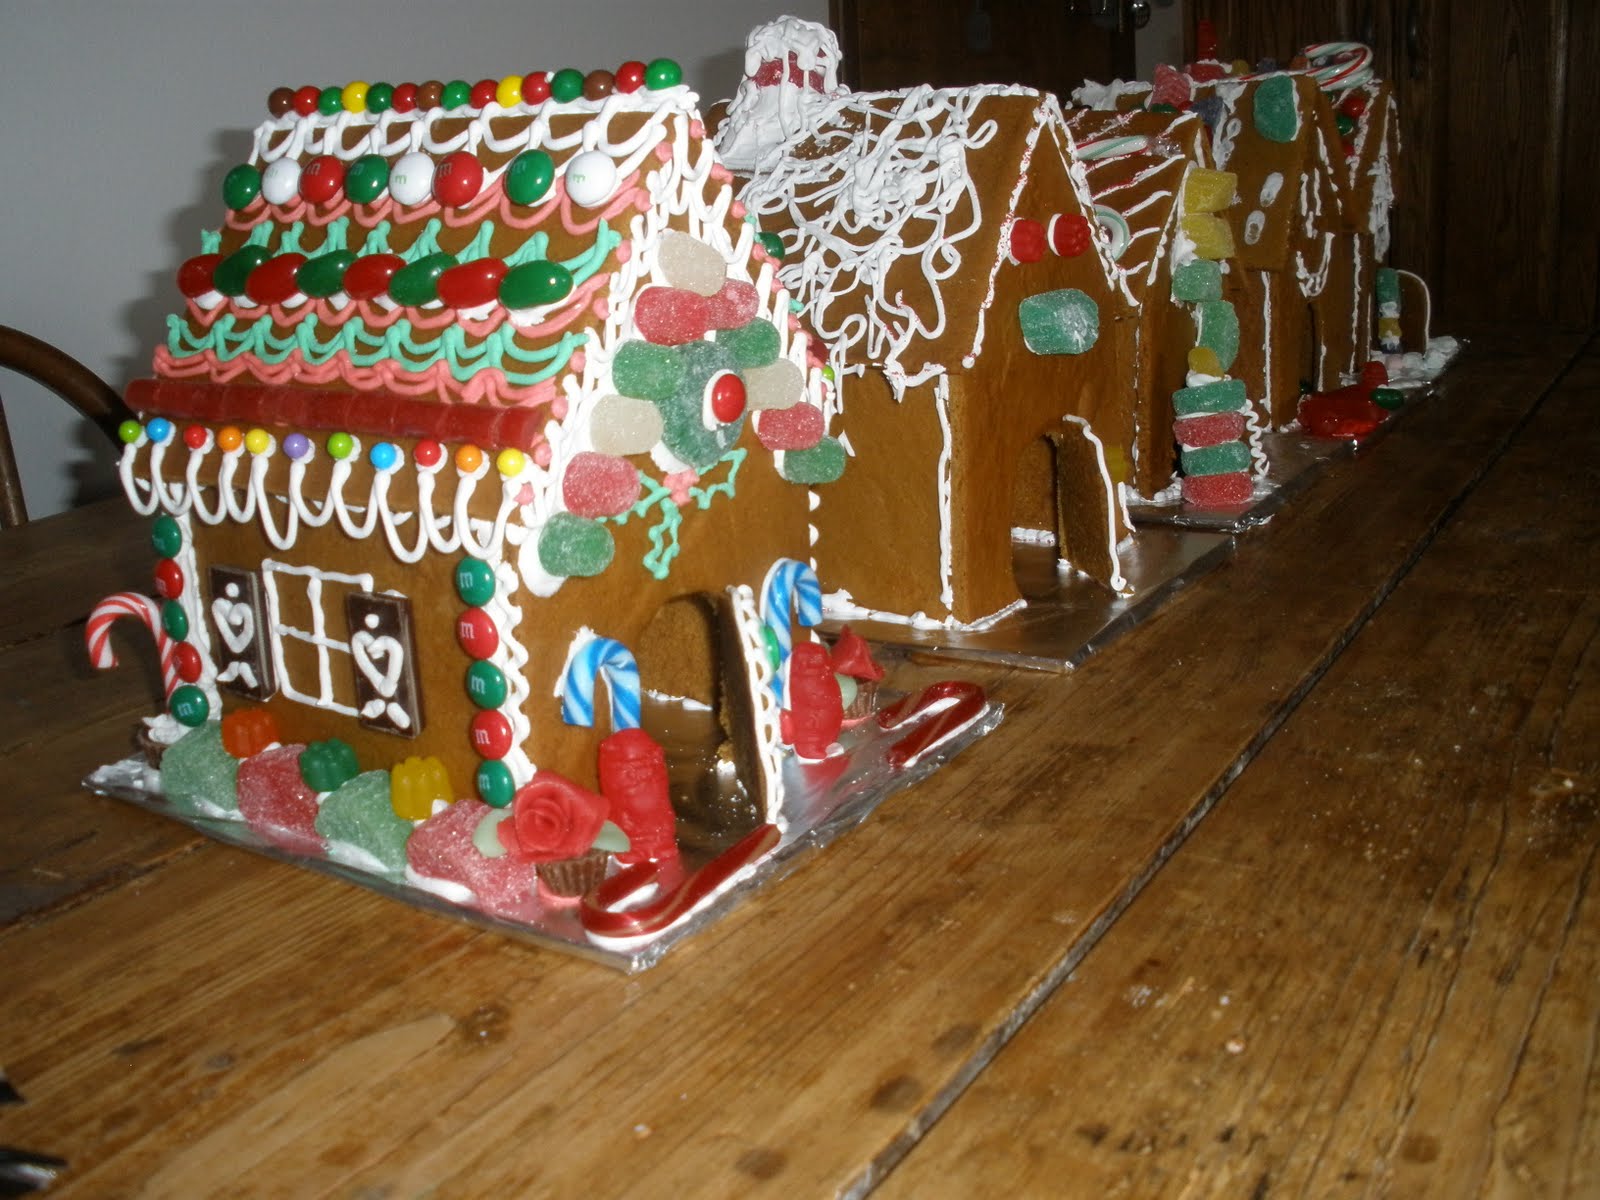
Gingerbread houses are a tradition at our house. There is a wonderful aroma that fills the room as the gingerbread is baking.
My kids used to love making these gingerbread houses. This year I made them each a house and my three teenage boys half-heartedly threw some candy on to make me happy. I am thinking they have outgrown this tradition. My daughter still had fun with it so maybe we will have to turn it into a mother/daughter activity.
The recipe is simple but I got it from a friend and I am not sure she would like me to post it.
One thing I will tell you is that I love using meringue powder rather than egg whites in my royal icing.